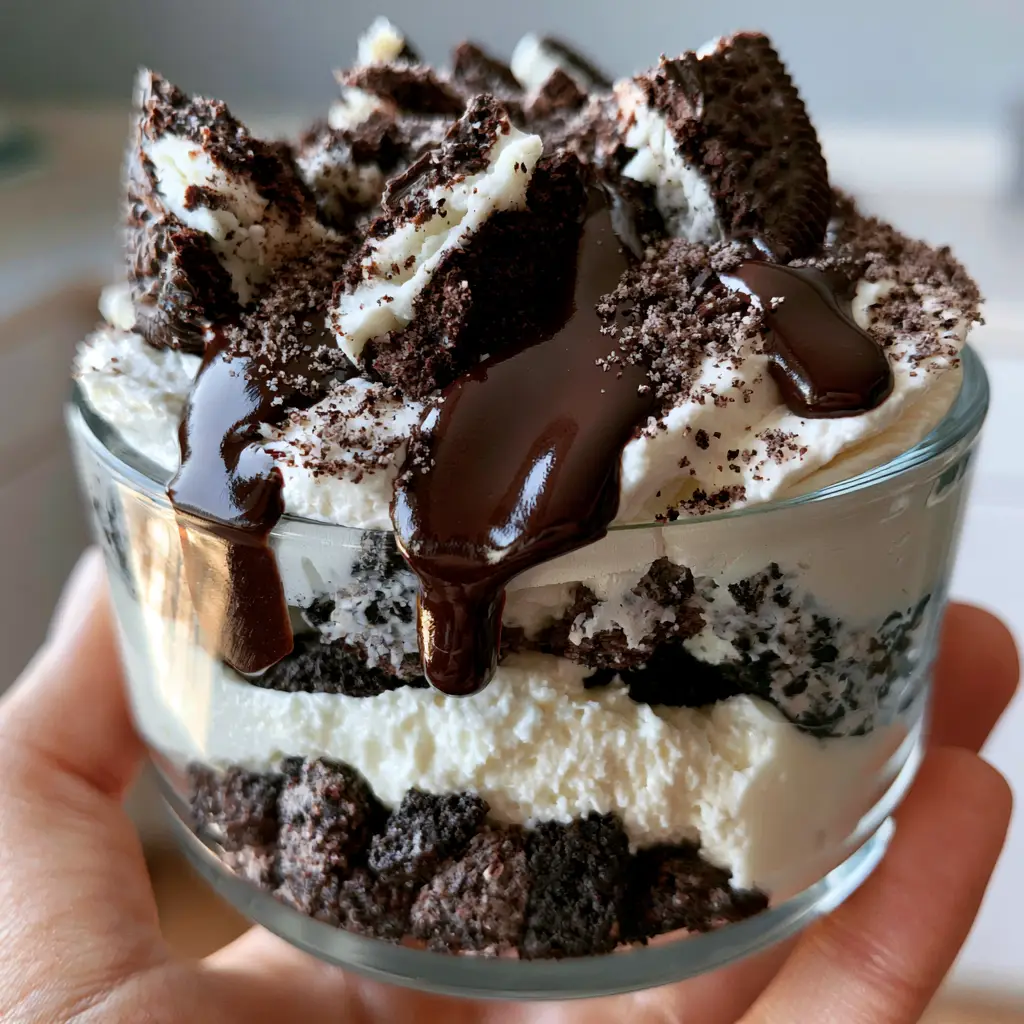
When the craving for something decadent hits but the summer heat makes turning on your oven unthinkable, this no bake oreo dessert is the ultimate culinary solution. This isn’t just another cookie pudding; it is a masterpiece of textures, featuring distinct, thick vertical layers that look as professional as a high-end bakery display. From the coarse, buttery chocolate base to the velvety mousse middle, every spoonful offers a symphonic blend of crunch and cream.
This “Oreo Lush” has become a staple in my kitchen because it bridges the gap between a casual family treat and a dinner-party-worthy centerpiece. The visual appeal is undeniable—think deep dark cocoa tones contrasted against a snow-white cream cheese layer peppered with real vanilla bean specks. Whether you are hosting a backyard BBQ or looking for a comforting weekend project, this recipe delivers maximum “wow” factor with minimal effort.
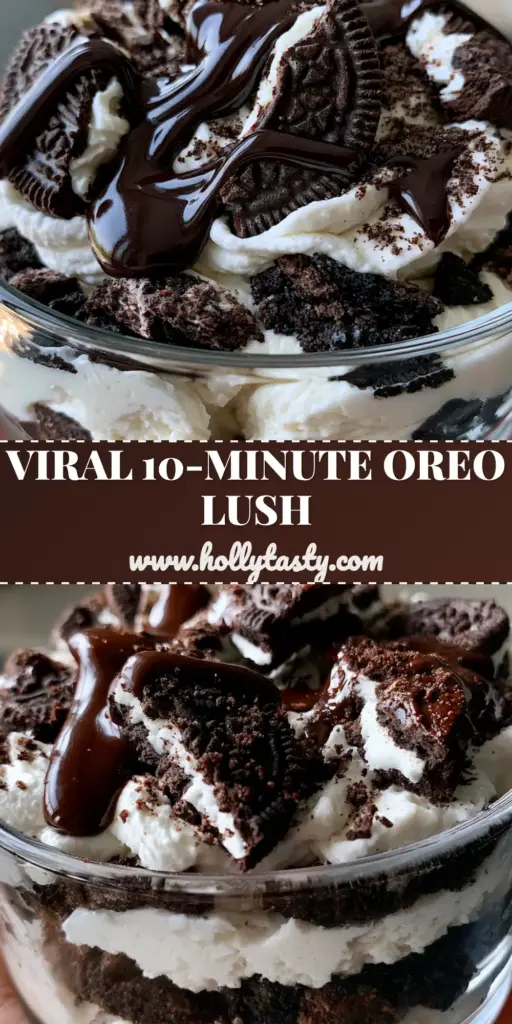
As you dive into this guide, you’ll see how we achieve that iconic “handheld glass bowl” look featured in our photography. We aren’t just tossing ingredients together; we are building a structural dessert that holds its shape while melting in your mouth. Get ready to master the art of the perfect layered lush.
Why This Layered Oreo Masterpiece Works
- Textural Contrast: We use a specific “coarse crush” technique for the base to ensure you get actual chocolate cookie chunks rather than a fine, sandy dust.
- Visual Precision: The middle layer isn’t just white; it’s a dense, velvety mousse infused with vanilla bean specks that signal high-quality craftsmanship to your guests.
- The “Gloss” Factor: A final drizzle of high-shine chocolate ganache creates a professional finish that catches the light beautifully, just like in our provided visual blueprint.
- Effortless Construction: No eggs, no baking, and no complicated tempering—just pure assembly and strategic chilling.
The Anatomy of a Perfect No-Bake Masterpiece
To achieve the specific visual results of our no bake oreo dessert, you need the right building blocks. Each ingredient plays a structural and aesthetic role in the final bowl.
Chocolate Sandwich Cookies: You will need 36 cookies (approximately 14.3 oz / 405g). These provide the “fine cocoa cookie dust” for the garnish and the “coarse crushed” foundation for the base.
Unsalted Butter: 1/2 cup (115g), melted. This acts as the “invisible glue” that binds the coarse chunks into a stable, sliceable crust without making it rock hard.
Full-Fat Cream Cheese: 16 oz (450g), softened to room temperature. This is the heart of the “dense velvety white” layer; using full-fat is non-negotiable for the structural integrity of the vertical layers.
Vanilla Bean Paste: 1 tbsp (15ml). While extract works, the paste provides those iconic “vanilla bean specks” that make the mousse layer visually stunning and gourmet.
Powdered Sugar: 1.5 cups (180g). This sweetens the cream cheese mousse while providing a smooth, grit-free texture that reflects light perfectly.
Heavy Whipping Cream: 2 cups (480ml), divided. You’ll use half to lighten the cream cheese layer and the other half for the “fluffy whipped cream topping.”
Chocolate Syrup or Ganache: 1/4 cup (60ml). This creates that “glossy chocolate syrup drizzle” that adds the final touch of luxury and deep cocoa flavor.
Essential Tools for Precision Layering
Achieving the look of a high-resolution food photograph requires more than just ingredients; it requires the right “culinary forensics” equipment. To mirror the key lime pie trifle style of presentation, a clear vessel is mandatory.
You will need a large 9×13 inch (23x33cm) glass dish or, for the individual look shown in our photos, 8-10 clear glass dessert bowls. A food processor is helpful for the “fine cookie dust,” but a heavy rolling pin is better for creating the “coarse chocolate cookie chunks” required for the base. Finally, a stand mixer or electric hand mixer is essential to beat the cream cheese into a “velvety mousse” consistency without any lumps.
Step-by-Step Architecture: Building the Layers
Phase 1: The Coarse Cookie Foundation
Place 24 Oreo cookies into a large zip-top bag. Using a rolling pin, crush them until they are mostly coarse chunks about the size of a pea, rather than a fine powder. This ensures the “bottom crust of coarse dark chocolate cookie chunks” described in our visual prompt.
Transfer the chunks to a bowl and pour in 1/2 cup (115g) of melted butter. Stir until every piece is glistening. Press this mixture firmly into the bottom of your clear glass bowl or individual serving dishes. Place in the freezer for 10 minutes to set the “invisible glue.”
Phase 2: The Velvet Vanilla Mousse
In a large mixing bowl, beat 16 oz (450g) of softened cream cheese with 1.5 cups (180g) of powdered sugar and 1 tbsp (15ml) of vanilla bean paste. Watch for the mixture to transform from a grainy texture to a “dense velvety white” satin finish. You should clearly see the dark vanilla specks distributed throughout.
In a separate chilled bowl, whip 1 cup (240ml) of heavy cream until stiff peaks form. Gently fold this into the cream cheese mixture. This aeration turns a heavy block of cheese into a “fluffy mousse” that still holds a sharp vertical line when layered. Spread this over your chilled cookie base using an offset spatula for a perfectly flat horizon.
Phase 3: The Cloud-Like Topping
Whip the remaining 1 cup (240ml) of heavy cream with 2 tbsp (15g) of powdered sugar until it looks like “fluffy whipped cream.” Do not over-beat; you want it to look soft and cloud-like, not buttery or yellowed. Gently dollop this over the mousse layer, creating a thick, pillowy top layer.
Phase 4: The Visual Garnish (The “Money Shot”)
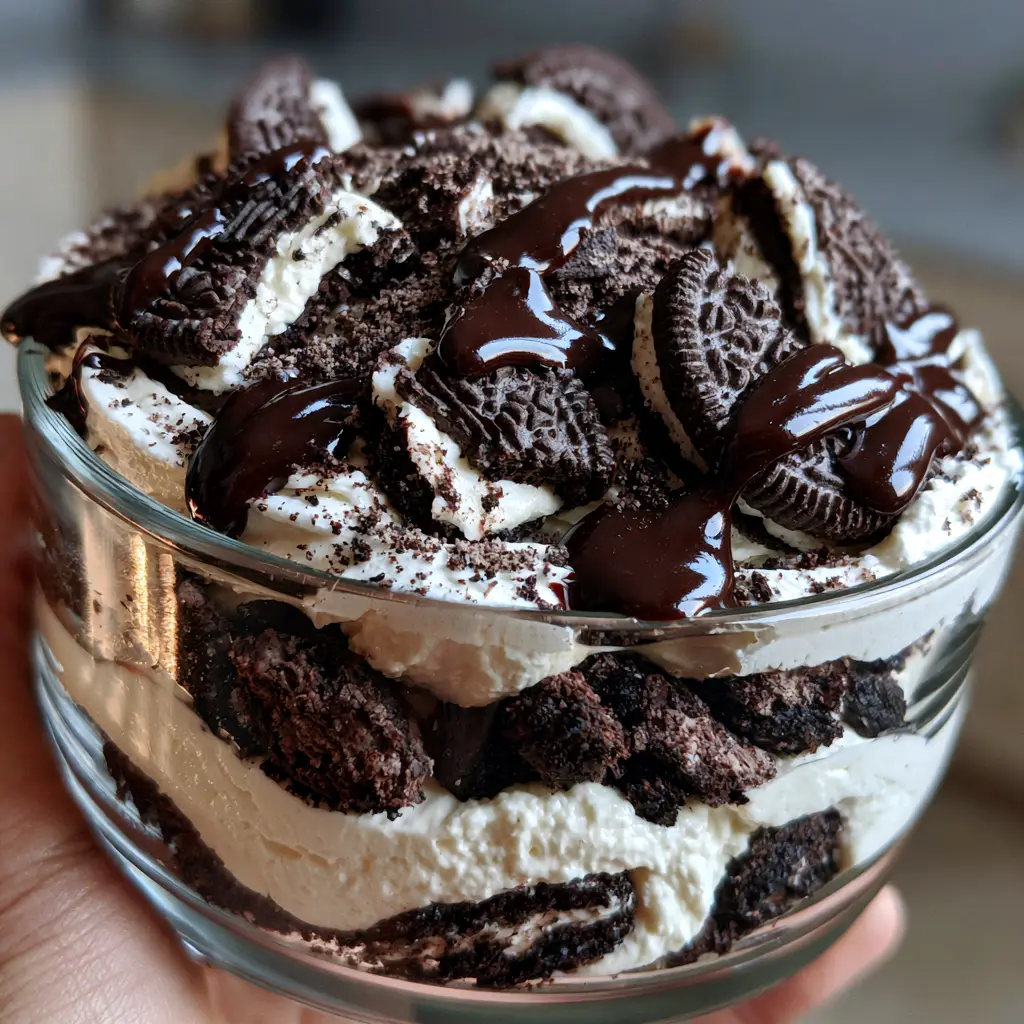
This is where we match the “Midjourney Prompt” exactly. Take your remaining 12 cookies. Break 8 of them by hand into “large broken Oreo pieces,” ensuring the white creme filling is visible. Nestle these into the whipped cream.
Take the final 4 cookies and pulverize them into “fine cookie dust.” Sprinkle this across the top. Finally, take your glossy chocolate syrup and perform a “generous drizzle” in a zig-zag pattern. The syrup should create a “slight shimmer” as it hits the soft morning light.
Expert Tips for a Picture-Perfect Finish
- The Temperature Rule: Ensure your cream cheese is truly at room temperature. If it’s even slightly cold, you will have “white lumps” instead of the “velvety white cream cheese mousse” required for the visual blueprint.
- The Clean Cut: If making this in a large pan, freeze the dessert for 30 minutes before slicing. This firms up the butter in the crust, giving you those “distinct, thick vertical layers” without the bottom crumbling.
- Sabilizing the Top: If you aren’t serving immediately, add 1 tsp of gelatin or a stabilizer to the whipped cream topping to prevent it from weeping or losing its “fluffy” height.
- The Dusting Technique: Use a fine-mesh sieve to apply the “cookie dust” garnish. This prevents large clumps from ruining the “minimalist kitchen” aesthetic of the final dish.
Storing Your No Bake Oreo Dessert
Because this is a dairy-forward recipe, it must remain refrigerated. Cover the glass bowl tightly with plastic wrap to prevent the whipped cream from absorbing “fridge smells.” It will stay fresh and hold its structural integrity for up to 4 days.
I do not recommend freezing this for long-term storage, as the cream cheese mousse can sometimes change texture upon thawing, becoming slightly grainy rather than “velvety.” However, a quick 20-minute stint in the freezer before serving makes it taste like a premium ice cream cake!
What to Serve With This Decadent Treat
This no bake oreo dessert is quite rich, so it pairs beautifully with acidic or salty counterpoints. If you are serving this at a summer gathering, consider a refreshing chickpea feta avocado salad or a crisp cucumber ranch salad to cleanse the palate between bites.
For a full “no-bake” spread, you might also enjoy our no-bake summer desserts collection or a batch of lemonade puppy chow for the kids. If you prefer a savory contrast, a bowl of cowboy caviar dip offers the perfect salty crunch before the sweet finale.
Frequently Asked Questions
Yes, this dessert is actually better when made 4-24 hours in advance. This allows the ‘invisible glue’ of the butter-bound crust to fully set and the mousse layer to firm up for cleaner slices.
I do not recommend it. Low-fat cream cheese has a higher water content and won’t yield the ‘dense velvety’ texture needed to support the layers, potentially resulting in a runny dessert.
The secret is chilling. Chill the cookie base for 10 minutes in the freezer before adding the mousse. After adding the mousse, use an offset spatula to level it before dolloping the whipped cream on top.
They are very similar! ‘Lush’ typically refers to the creamy, mousse-like texture of the middle layers, whereas ‘Lasagna’ emphasizes the stacking of multiple distinct layers in a large rectangular dish.
Vanilla bean paste contains the actual seeds from the pod. This provides the ‘vanilla bean specks’ seen in professional photography, adding a gourmet visual cue and a deeper floral flavor.
The Ultimate No Bake Oreo Lush Recipe
No Bake Oreo Dessert: The Ultimate Layered Oreo Lush Recipe
Ingredients
Equipment
Method
- Place 24 cookies in a bag and crush with a rolling pin until coarse chunks form (pea-sized).
- Mix coarse chunks with 1/2 cup (115g) melted butter and press into a clear glass bowl. Chill for 10 minutes.
- Beat softened cream cheese, 1.5 cups (180g) powdered sugar, and 1 tbsp (15ml) vanilla bean paste until velvety and smooth with visible specks.
- Whip 1 cup (240ml) heavy cream to stiff peaks and fold into the cream cheese mixture. Spread over the crust.
- Whip the remaining 1 cup (240ml) heavy cream with 2 tbsp powdered sugar until fluffy. Spread over the mousse layer.
- Top with 8 broken Oreo pieces (showing filling), a generous drizzle of 1/4 cup (60ml) glossy chocolate syrup, and a dusting of fine cookie crumbs.
Notes
Ensure the butter is melted but not boiling when adding to cookie chunks.
Closing & Call to Action
The no bake oreo dessert is more than just a sweet treat; it’s a textural experience that proves you don’t need a hot oven to create a gourmet result. By following the “visual recipe blueprint” and focusing on those thick, vertical layers, you’ll produce a dessert that looks like it belongs on the cover of a magazine. The combination of coarse cookie chunks, vanilla-flecked mousse, and glossy chocolate drizzle is a guaranteed crowd-pleaser.
If you made this Oreo Lush, I would love to hear how it turned out! Please leave a comment below and let me know if you used individual bowls or one big dish. Don’t forget to follow me on Pinterest and share your photos with our community. Happy no-baking!