There is nothing quite like the nostalgic comfort of a classic deviled egg, but when you transform those familiar flavors into a decadent, scoopable Deviled Eggs Dip, you create the ultimate party showstopper. This isn’t your average mushy egg salad; it is a sophisticated play on textures featuring a cloud-like egg yolk mousse and hand-cut chunks of tender whites.
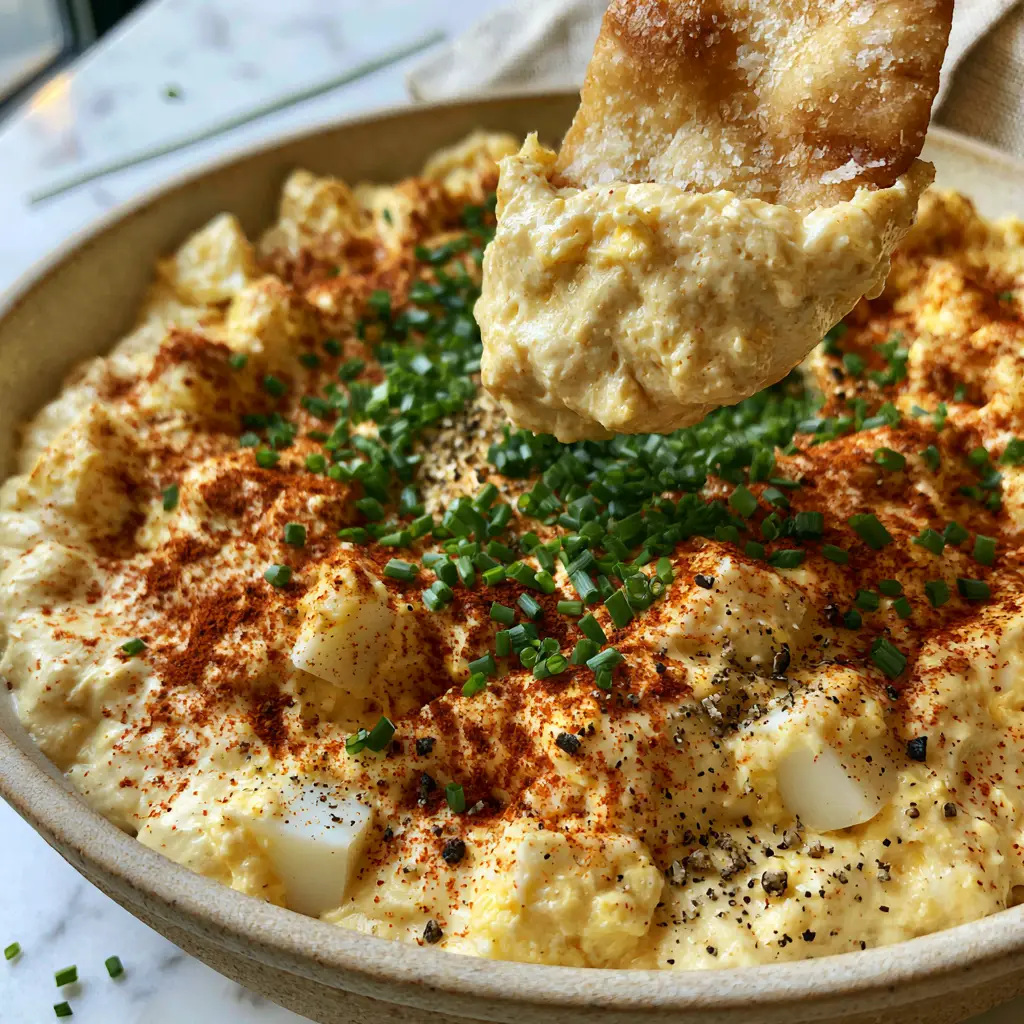
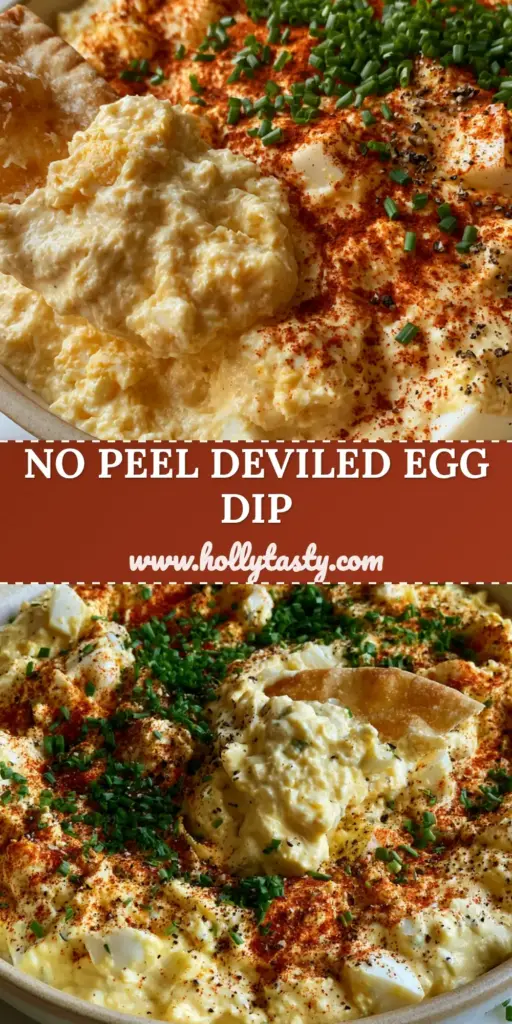
Imagine a wide, shallow ceramic bowl filled with a rich, pale yellow base that has been whipped to airy perfection. Topped with precise 1/2-inch cubes of egg whites and a vibrant dusting of smoked paprika, this dip looks as stunning as it tastes. The first bite, scooped up with a salty, golden toasted pita chip, reveals a creamy interior texture that is both indulgent and refreshing.
Whether you are hosting a summer garden party or looking for a high-protein snack, this Deviled Eggs Dip delivers on every culinary promise. It captures the essence of a handheld classic but presents it in a modern, communal way that invites everyone to dive in. Let’s explore how to achieve this specific forensic visual accuracy in your own kitchen.
Why This Chunky Egg White Dip Is a Total Game Changer
- The Dual-Texture Experience: By separating the yolks from the whites, we achieve a velvety “mousse” base paired with distinct, tender 1/2-inch cubes of protein for a superior mouthfeel.
- Visual Forensics: Every element, from the finely minced fresh chives to the coarse cracked black pepper, is designed to provide high-contrast color and gourmet appeal.
- Maximum Scoopability: Unlike traditional deviled eggs that can be finicky to serve, this dip is built for the “golden toasted pita chip,” ensuring a perfect ratio of garnish to base in every bite.
- Advanced Flavor Depth: We go beyond basic mayo by incorporating smoky notes and sharp acids to balance the richness of the egg yolks.
Foundations for a Flawless Yolk-Based Appetizer
To recreate the visual recipe blueprint exactly, you need high-quality ingredients that provide both structural integrity and vibrant color. Here is what you need to gather for your Deviled Eggs Dip.
Large Eggs: Use the freshest eggs possible for yolks that are bright yellow and whites that hold their shape when chopped into 1/2-inch (1.27cm) cubes. These are the stars of the show, providing both the mousse base and the chunky topping.
Mayonnaise: 1/2 cup (120ml) of high-fat, heavy-duty mayonnaise is essential for creating that “rich, pale yellow yolk-and-mayonnaise mousse” described in the prompt. It acts as the primary emulsifier for the airy base.
Dijon Mustard: 1 tbsp (15g) adds a necessary acidic tang and a hint of spice that cuts through the fat of the yolks. It also deepens the golden hue of the mousse.
Smoked Paprika: A generous 1 tsp (2g) for the “vibrant dusting” on top. Unlike regular paprika, the smoked variety provides a woody depth that complements the creamy eggs perfectly.
Fresh Chives: 2 tbsp (6g), finely minced, provide the “bright green” contrast needed for visual pop. Their mild onion flavor enhances the dip without overpowering the delicate yolks.
Coarse Cracked Black Pepper: Freshly cracked large peppercorns provide a sharp bite and a beautiful visual “flecked” appearance against the yellow mousse. Don’t use pre-ground pepper here.
Sea Salt: 1/2 tsp (3g) to brighten the flavors. Salt is the “invisible” scientific requirement that makes the fats in the egg yolks more perceptible to the palate.
Lemon Juice: 1 tsp (5ml) of fresh citrus provides the bright finish that keeps the dip tasting “chilled” and fresh rather than heavy. It also helps stabilize the yolk mousse.
Pita Chips: 1 bag of salty, golden toasted pita chips. These provide the structural “scoop” needed to hold the thick portion of the dip shown in the handheld photography.
Kitchen Tools for a Professional Texture
Achieving the specific “mousse” texture requires a few specific tools to ensure the yolks are completely smooth before being folded into the whites.
Fine-Mesh Sieve or Food Processor: To get that “mousse” consistency, pressing the cooked yolks through a sieve is the professional secret. A small food processor also works to emulsify the yolks with the mayo.
Sharp Chef’s Knife: Essential for the “hand-chopped” white boiled eggs. You need clean edges on those 1/2-inch cubes to match the visual blueprint.
Shallow Ceramic Bowl: The presentation calls for a wide, shallow bowl which increases the surface area for garnishes like chives and paprika. This is a key element for cold appetizers meant for sharing.
Mastering the Art of the Perfect Deviled Eggs Dip: Step-by-Step
Follow these precise culinary steps to ensure your dip looks exactly like the smartphone photo described—chunky, creamy, and vibrant.
Step 1: The Precision Hard-Boil
Place 10 large eggs in a single layer in a saucepan and cover with 1 inch (2.5cm) of cold water. Bring to a rolling boil, then immediately remove from heat, cover, and let sit for exactly 12 minutes. This timing ensures the yolks are fully set but still bright yellow, avoiding the “green ring” of sulfur that ruins the visual of the mousse.
Step 2: The Ice Bath and Peel
Transfer the eggs to a bowl of ice water for at least 10 minutes. This thermal shock makes the eggs easier to peel and ensures the whites stay “tender” as described in the prompt. Peel the eggs carefully under cool running water to keep the surfaces smooth.
Step 3: Creating the Silky Yolk Mousse
Slice the eggs in half and pop the yolks into a medium bowl. Use a fork or a fine-mesh sieve to crumble them until no large lumps remain. Whisk in 1/2 cup (120ml) mayonnaise, 1 tbsp (15g) Dijon mustard, 1 tsp (5ml) lemon juice, and a pinch of salt. Beat vigorously until the mixture is a “rich, pale yellow mousse” with an airy, cloud-like texture.
Step 4: The Hand-Chopped Texture Layer
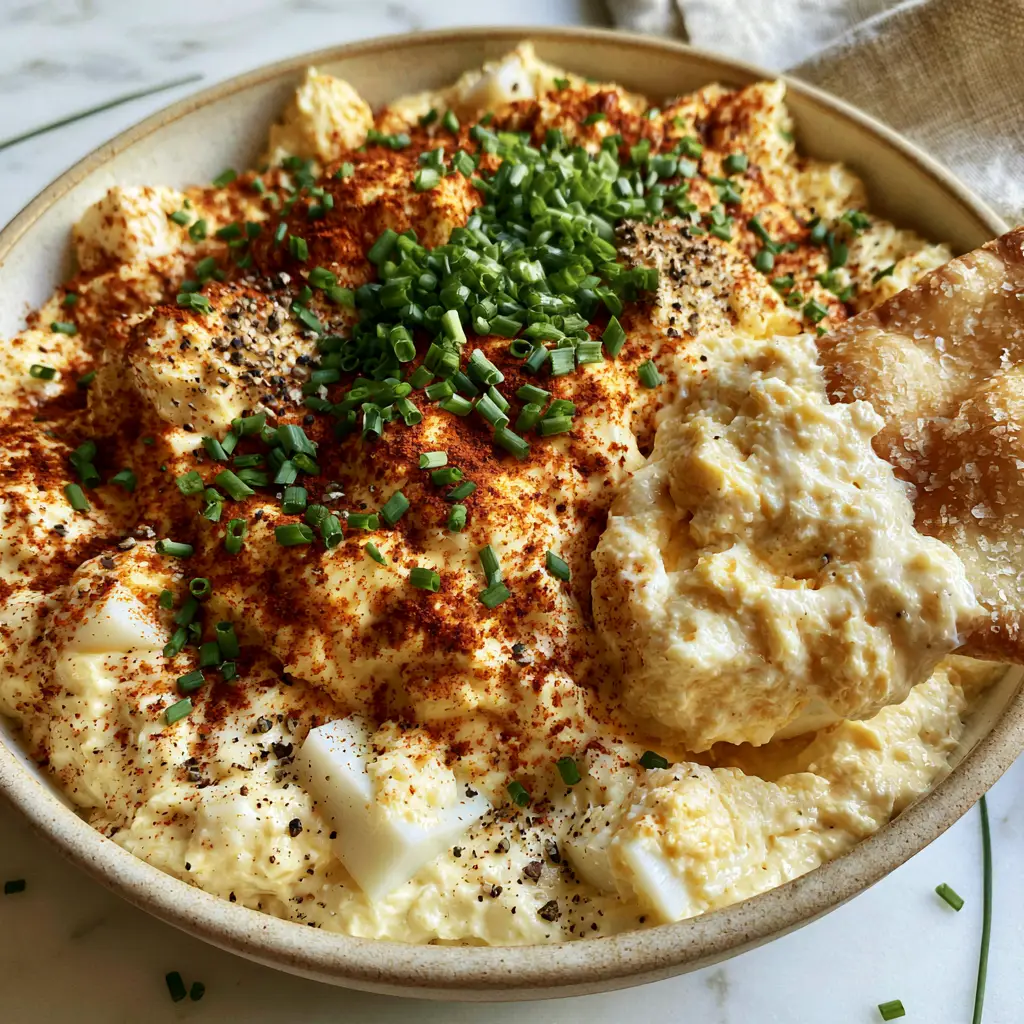
Take the remaining egg whites and place them on a cutting board. Using a sharp knife, cut them into uniform 1/2-inch (1.27cm) cubes. This “chunky” element is what distinguishes this Deviled Eggs Dip from a standard spread. Gently fold about 3/4 of these whites into the yolk mousse, leaving the rest for the top layer.
Step 5: Assembly and Forensic Garnishing
Transfer the mixture to a wide, shallow ceramic bowl. Top with the remaining 1/2-inch white cubes. Apply a “vibrant dusting” of smoked paprika across the entire surface. Sprinkle the “generous” portion of finely chopped chives and finish with several cracks of coarse black pepper. The result should look like a professional, handheld food photo ready for a close-up.
Pro-Level Troubleshooting for Your Egg Dip
- Avoid the “Soggy” Dip: Ensure your egg whites are patted completely dry with a paper towel after peeling. Any excess moisture will break the emulsion of the yolk mousse.
- Temperature Control: Serve the dip in a “chilled serving bowl.” If you are serving outdoors, place the ceramic bowl inside a larger bowl filled with ice to maintain that fresh, cool interior texture.
- The Pita Chip Test: If your dip feels too thick to scoop without breaking the chip, whisk in an extra tablespoon of mayonnaise or a splash of heavy cream to the yolk base before adding the whites.
- Herb Freshness: Only chop the chives right before serving. Pre-chopped chives lose their “bright green” luster and can become wilted and dark.
Preservation and Storage Guidelines
Because of the mayonnaise and egg base, this Deviled Eggs Dip must be handled with care. Store any leftovers in an airtight container in the refrigerator for up to 3 days. Do not freeze this recipe, as the emulsion of the mousse will break and the egg whites will become rubbery upon thawing.
If you are making this ahead of time, store the yolk mousse and the chopped whites in separate containers. Mix and garnish just before serving to keep the smoked paprika from bleeding into the yellow base and to ensure the chives stay crisp.
The Perfect Party Spread Pairings
This savory dip is a powerhouse on its own, but it truly shines when part of a larger appetizer spread. To balance the richness of the yolk mousse, consider serving it alongside a refreshing chilled cucumber ranch salad. The crispness of the cucumbers offers a great textural counterpoint.
If you are looking for more protein-heavy options for a game day spread, these bacon wrapped little smokies provide a salty, smoky flavor that echoes the paprika in the dip. For a vegetarian-friendly addition, a bright fresh corn salad brings a touch of sweetness that cuts through the creamy egg profile beautifully.
Frequently Asked Questions
Yes, you can prepare the components ahead of time. However, for the best visual result, store the yolk mousse and chopped whites separately and assemble just before serving to prevent the garnishes from bleeding.
The secret is using a fine-mesh sieve. Pressing the hard-boiled yolks through the mesh with the back of a spoon breaks them into a fine powder that incorporates seamlessly into the mayonnaise.
While mayonnaise provides the classic flavor and texture, you can substitute half of it with Greek yogurt or sour cream for a tangier profile, though the ‘mousse’ will be slightly less airy.
Sturdy chips are best. We recommend golden toasted pita chips or thick-cut kettle chips. They provide the necessary ‘scoop’ strength for the thick, chunky mousse.
This usually happens if the egg whites aren’t dried properly after peeling or if the dip sits out too long at room temperature. Always pat the whites dry and serve the dip in a chilled bowl.
The Definitive Deviled Eggs Dip Recipe
Deviled Eggs Dip with Creamy Yolk Mousse and Toasted Pita Chips
Ingredients
Equipment
Method
- Place eggs in a pot, cover with water, bring to a boil, then remove from heat and let sit covered for 12 minutes.
- Transfer eggs to an ice bath for 10 minutes, then peel carefully.
- Separate yolks and whites. Mash yolks through a sieve and whisk with mayo, mustard, lemon juice, and salt until a pale yellow mousse forms.
- Hand-chop the egg whites into uniform 1/2-inch cubes. Fold 3/4 of the cubes into the mousse.
- Spread dip into a shallow bowl. Top with remaining white cubes, smoked paprika, chives, and cracked black pepper.
Notes
Serve in a chilled bowl to maintain the creamy mousse texture.
Closing & Call to Action
The Deviled Eggs Dip is more than just a recipe; it is a masterclass in balancing simple ingredients with elevated culinary techniques. By focusing on the “mousse” texture of the yolks and the specific 1/2-inch cubes of the whites, you create a dish that is visually stunning and incredibly satisfying. If you loved this recipe, please leave a comment below and share your photos with us!
Don’t forget to follow us on Pinterest for more visually-driven recipe inspiration. Sign up for our newsletter to get the latest party appetizers delivered straight to your inbox!