There is nothing quite like the nostalgic aroma of a campfire, but when the summer heat reaches its peak, the last thing you want to do is hover over a literal flame. Enter the Frozen s’mores. This isn’t your average ice cream sandwich; it is a meticulously engineered, three-layer masterpiece that captures every iconic flavor of the classic fireside snack in a chilled, handheld format.
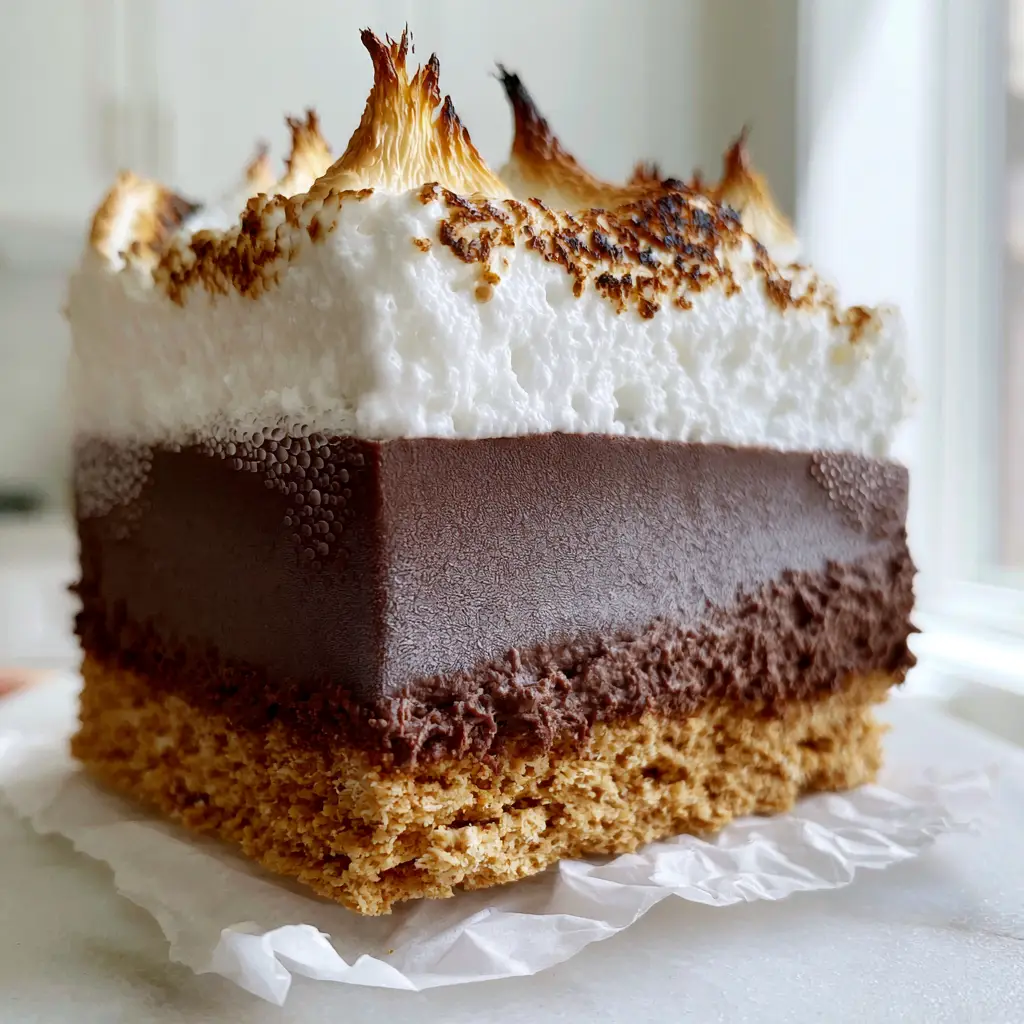
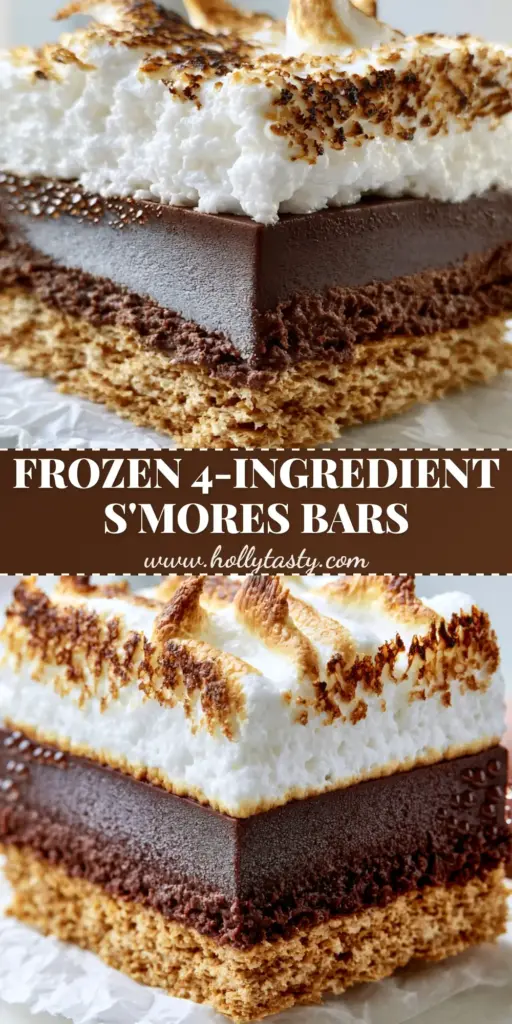
Imagine biting through a cloud of toasted, pillowy marshmallow fluff with charred peaks, only to hit a thick, velvety layer of dark chocolate fudge ganache that has a sophisticated, frosty matte finish. Beneath it all lies a pressed golden graham cracker crust that provides the perfect buttery snap. These bars are designed to be decadent, refreshing, and visually stunning, complete with those tiny micro-condensation droplets that signal the perfect temperature for a mid-summer indulgence.
Why These Frozen s’mores Are the Ultimate Summer Flex
- The Perfect Texture Trifecta: You get the crunch of the pressed graham cracker, the fudge-like bite of the ganache, and the airy stickiness of the toasted fluff.
- No-Bake Simplicity: Aside from a quick melt of chocolate and a flash of a torch, this recipe keeps your kitchen cool and your stress levels low.
- Make-Ahead Magic: These bars thrive in the freezer, making them the perfect candidate for your next backyard BBQ or pool party.
- Gourmet Aesthetics: With perfectly straight layers and charred marshmallow peaks, these look like they walked straight out of a high-end artisanal bakery.
The Secret Architecture of a Perfect Graham Cracker Base
The foundation of any great bar is the crust. For these Frozen s’mores, we aren’t just tossing crumbs together; we are creating a compressed, golden-brown floor that can support the weight of the ganache without crumbling away. You want a crust that is firm enough to hold in your hand but tender enough to yield to your teeth.
Honey Graham Crackers: 2 cups (approx. 300g) of finely crushed crumbs. Use a food processor to ensure a uniform “sand” texture, which allows the butter to bind every single particle effectively.
Unsalted Butter: 1/2 cup (115g), melted. This acts as the “glue.” As it chills, the butter solidifies, locking the crumbs into a rigid, snap-hard structure that contrasts beautifully with the soft layers above.
Granulated Sugar: 2 tbsp (25g). A tiny bit of extra sugar helps with the structural integrity of the crust, creating a slight “candy” bond when pressed and chilled.
Engineering the Thick Dark Chocolate Fudge Ganache Layer
The middle layer is the heart of the Frozen s’mores experience. We aren’t using a simple chocolate syrup; we are crafting a professional-grade ganache. By using a high percentage of dark chocolate, we achieve that signature “frosty matte finish” mentioned in the visual blueprint once the bar is removed from the freezer.
Dark Chocolate (60% Cacao or higher): 12 oz (340g), finely chopped. High-quality chocolate ensures the layer stays “fudge-y” rather than “icy” when frozen. If you love rich treats, you might also enjoy my churro saltine toffee which shares that satisfying chocolate snap.
Heavy Whipping Cream: 1 cup (240ml). When emulsified with the chocolate, the cream provides the necessary fat to keep the ganache pliable enough to bite into even at sub-zero temperatures.
Pure Vanilla Extract & Sea Salt: 1 tsp (5ml) vanilla and a pinch of salt. These are your “invisible” flavor enhancers that bridge the gap between the sweet marshmallow and the bitter cocoa.
Creating the Snowy White Marshmallow Fluff Peaks
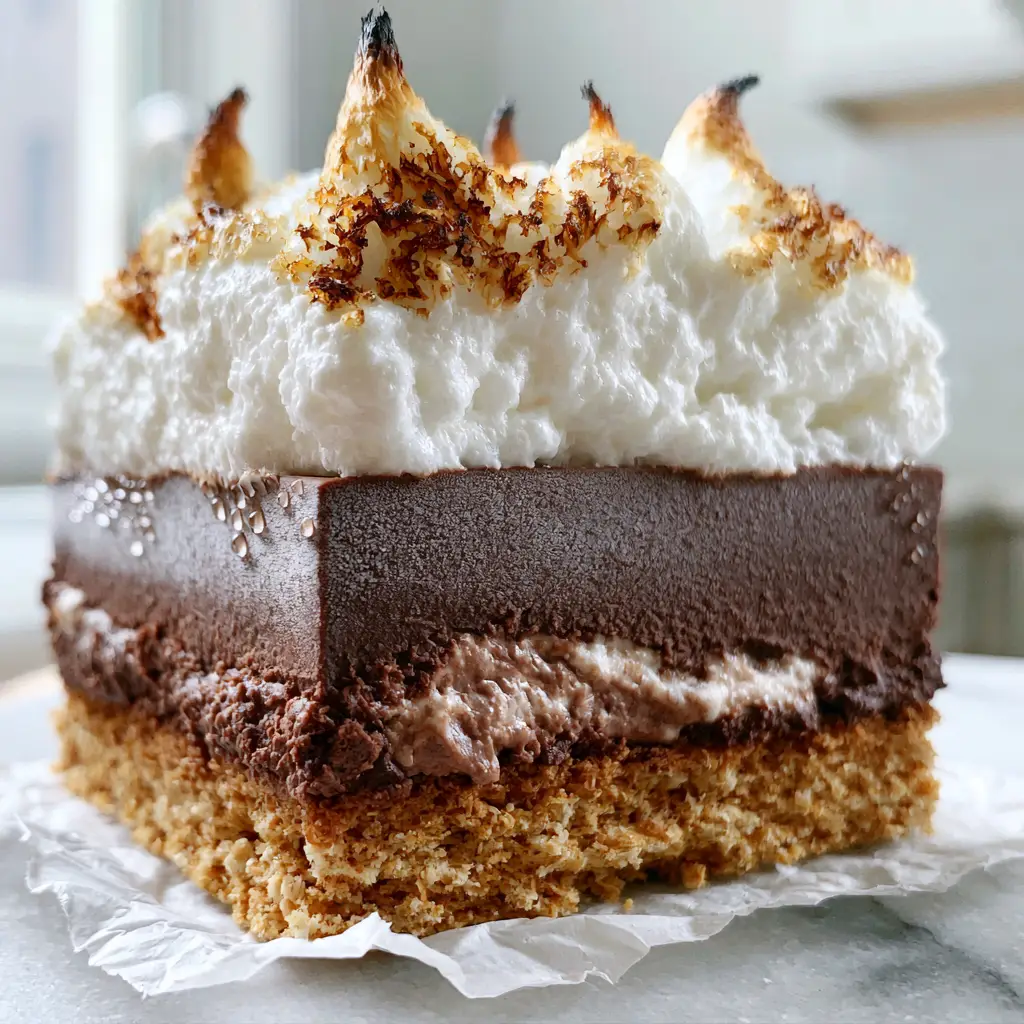
To achieve the “snowy white” appearance with “toasted golden-brown charred peaks,” we use a stabilized marshmallow fluff. This layer remains soft and airy even after hours in the freezer, providing a sensory contrast to the cold ganache below.
Marshmallow Fluff: 15 oz (425g). You can use store-bought for convenience or a homemade Italian meringue for extra stability. The key is to spread it with a small offset spatula to create “swooshes” and “valleys” that will catch the flame of your kitchen torch.
Graham Cracker Dusting: 1/4 cup (40g) of extra crumbs. A light dusting over the top adds a rustic visual appeal and a final hint of honey-wheat flavor.
Essential Equipment for Professional-Grade S’mores Bars
To get those “perfectly straight layers” and “charred peaks,” you will need a few specific tools from your culinary arsenal:
- 8×8-inch (20x20cm) Square Baking Pan: Lining this with parchment paper is non-negotiable for easy removal.
- Kitchen Culinary Torch: This is how we achieve the charred peaks without melting the frozen layers beneath. A broiler is too aggressive and will ruin the ganache.
- Offset Spatula: Essential for smoothing the ganache and creating the marshmallow texture.
- Heavy-Bottomed Saucepan: For gently scalding the cream without scorching it.
Step-by-Step Guide to Assembling the Frozen s’mores
Step 1: The Pressed Golden Crust
In a medium bowl, combine your graham cracker crumbs, melted butter, and sugar. Stir until the mixture feels like wet sand. Pour it into your prepared pan and use the bottom of a flat measuring cup to press down firmly.
Visual Cue: The crust should look compact and evenly distributed, with no loose crumbs visible. Place the pan in the freezer for at least 20 minutes to set.
Step 2: The Velvet Ganache Fusion
Place your chopped dark chocolate in a heat-proof glass bowl. In a small saucepan, heat the heavy cream until it just begins to simmer (look for tiny bubbles around the edges). Pour the hot cream over the chocolate and let it sit undisturbed for 5 minutes.
Gently whisk from the center outward until a glossy, dark emulsion forms. Stir in the vanilla and salt. Pour the ganache over the chilled crust and smooth the top. Return to the freezer for at least 2 hours.
Visual Cue: The ganache is ready when it has lost its high-gloss sheen and developed a slight “frosty matte finish” on the surface.
Step 3: The Fluff and Torch Transformation
Spread the marshmallow fluff over the frozen ganache layer. Use your spatula to create peaks and troughs. Use your kitchen torch to lightly brown the edges and tips of the marshmallow peaks until they are golden-brown and charred.
Immediately sprinkle with the remaining graham cracker crumbs. Return to the freezer for a final 1-2 hours to ensure the entire bar is “frozen solid” but biteable. If you are looking for more cold treats, check out my no-bake summer desserts for inspiration.
Expert Tips for the Perfect Frozen Treat
- The Clean Cut: For those perfectly straight layers, run a sharp chef’s knife under hot water and wipe it dry between every single cut. This prevents the marshmallow from sticking and the chocolate from smearing.
- Don’t Skip the Salt: Salt is the secret to cutting through the sugar in the fluff and the richness of the chocolate. It makes the flavors “pop.”
- Parchment “Slings”: Leave an overhang of parchment paper on two sides of the pan. This allows you to lift the entire block of s’mores out of the pan once frozen for easier slicing.
- Watch the Condensation: The “micro-condensation droplets” occur when the frozen bar meets humid air. To serve, let the bars sit at room temperature for 3-5 minutes. This makes the ganache the perfect “fudge” consistency.
Perfect Pairings and Serving Suggestions
These Frozen s’mores are a star on their own, but they also play well with other party favorites. If you are hosting a summer gathering, serve these alongside some lemonade puppy chow for a citrusy crunch. For a full spread, consider adding savory options like bacon wrapped little smokies or a refreshing cucumber ranch salad to balance the sweetness.
Frequently Asked Questions
It is not recommended. The intense heat of a broiler will melt the frozen ganache layer before the marshmallow toasts. A culinary torch allows for precision charring while keeping the base frozen.
You can, but the ganache will be much softer and sweeter. Dark chocolate (60%+) provides the best structural integrity and flavor balance against the sweet marshmallow fluff.
Dip a sharp chef’s knife into hot water and wipe it completely dry between every cut. This ensures the marshmallow fluff doesn’t stick and the chocolate layers stay distinct.
They can be stored in an airtight container for up to 2 weeks. For the best texture, let them sit at room temperature for 3-5 minutes before serving.
A matte finish is actually a sign of success for this recipe! When the high-quality dark chocolate ganache is frozen and then exposed to room temperature, it develops a frosty matte appearance followed by micro-condensation.
The Ultimate Frozen s’mores Recipe Card
Frozen s'mores: The Ultimate Three-Layer Handheld Summer Treat
Ingredients
Equipment
Method
- Mix graham crumbs, melted butter, and sugar. Press firmly into a parchment-lined 8x8 pan. Freeze for 20 minutes.
- Heat heavy cream until simmering; pour over chopped chocolate. Let sit 5 mins, then whisk until smooth with vanilla and salt. Spread over crust. Freeze for 2 hours until matte.
- Spread marshmallow fluff over the chocolate. Use a torch to create charred peaks. Dust with extra graham crumbs. Freeze for 1-2 hours until firm.
Notes
Do not use a broiler to toast the marshmallow as it will melt the frozen ganache layer.
Closing & Call to Action
There you have it—a sophisticated, refreshing, and visually stunning twist on a childhood favorite. These Frozen s’mores are guaranteed to be the highlight of your summer dessert rotation. The combination of the frosty ganache and the charred marshmallow is a sensory experience you won’t soon forget.
Did you make these? I’d love to see your “charred peaks”! Leave a comment below or share your photos and tag me on Pinterest. Don’t forget to subscribe to our newsletter for more elite-level recipes delivered straight to your inbox.