When the sun is blazing and the humidity hits its peak, the last thing anyone wants to do is crank up the oven. These no-bake summer desserts offer the perfect solution: a restaurant-quality, triple-layered strawberry cheesecake bar that stays cool from start to finish.
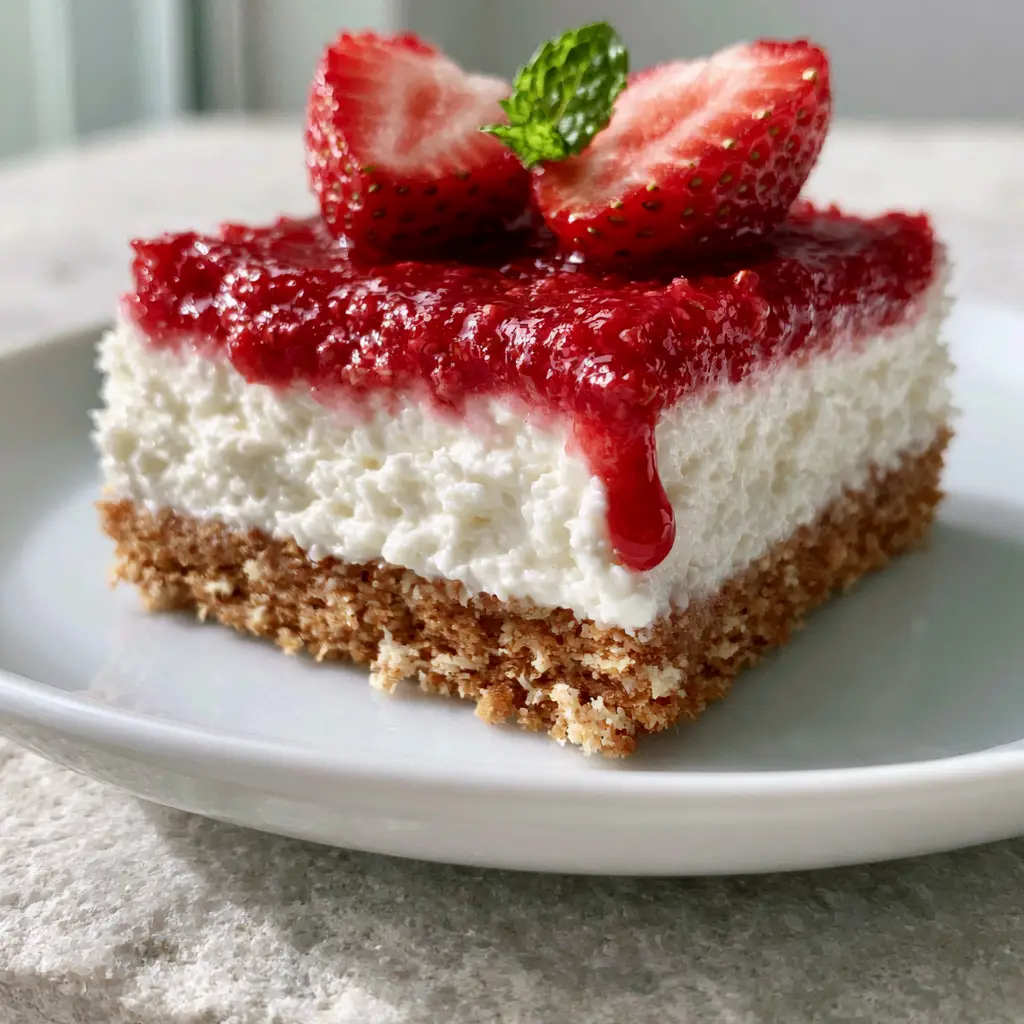
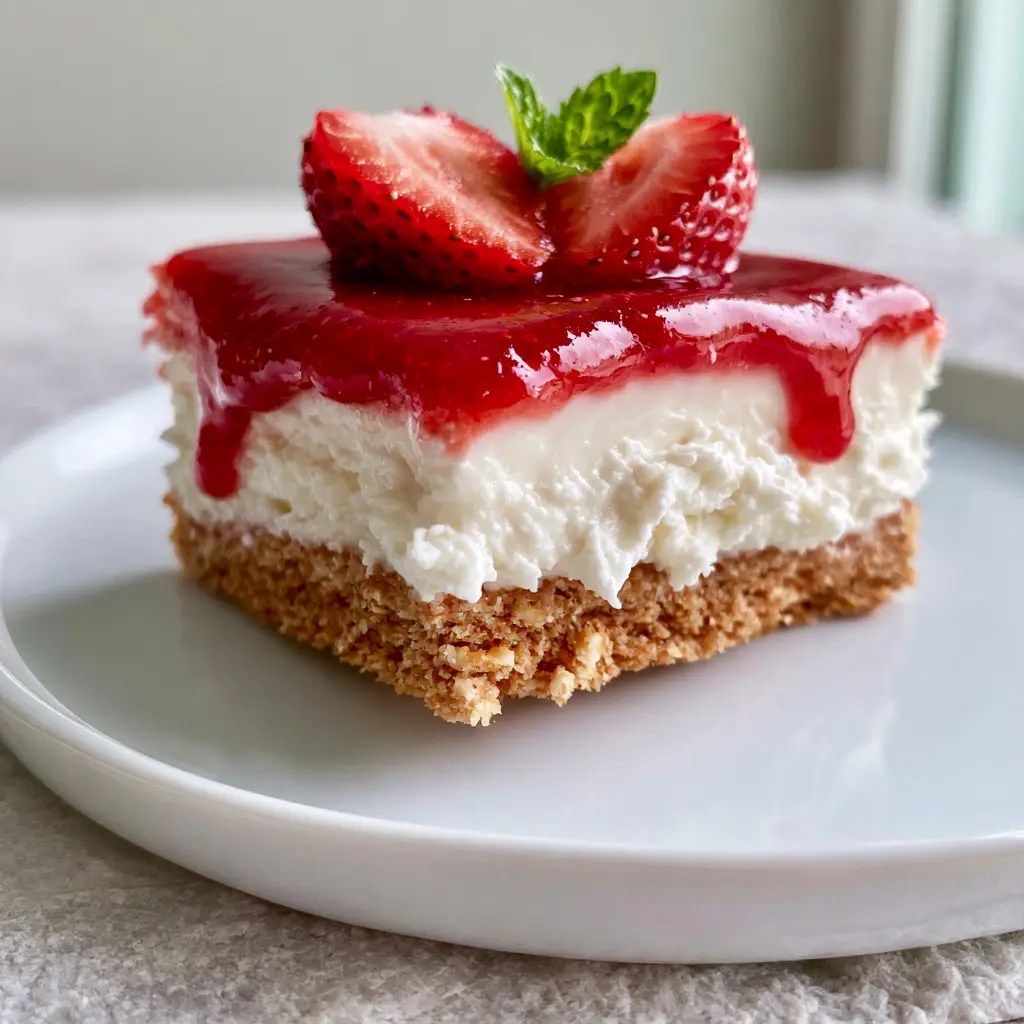
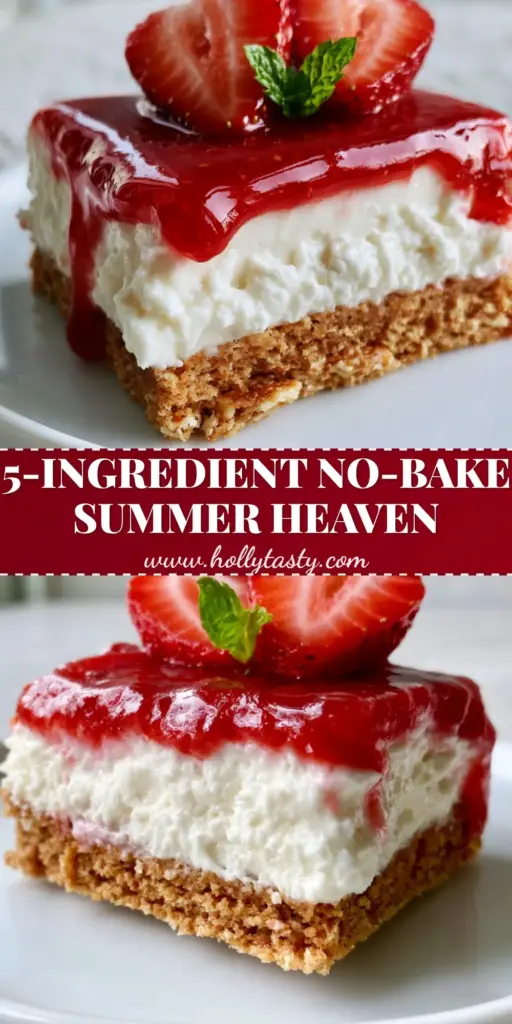
Imagine biting into a thick, chilled square where a buttery graham cracker base meets a snow-white, velvety cream cheese clouds. The experience is elevated by a glossy, ruby-red strawberry glaze that catches the light and drips perfectly down the sides.
This isn’t just a simple treat; it is a masterclass in texture and temperature management. By following our professional culinary cues, you will achieve that exact macro-photography look right in your own kitchen.
The Visual Allure of This Refreshing Summer Showstopper
- The Architectural Base: A dense, 1/2-inch (1.25cm) golden-brown graham cracker crust that provides a salty-sweet crunch against the soft filling.
- Snow-White Filling: A massive 2-inch (5cm) layer of whipped cream cheese that remains light, airy, and impeccably white.
- Glossy Ruby Glaze: A vibrant, fruit-forward topping that provides a high-shine finish and a concentrated strawberry punch.
- Garden-Fresh Garnish: Perfectly halved ripe strawberries and a pop of bright green mint for that professional, handheld photo aesthetic.
Essential Components for Your No-Bake Masterpiece
Graham Cracker Crumbs: You will need 2 cups (200g) of finely pulsed crumbs. These form the structural foundation that must be packed tightly to prevent crumbling when held aloft.
Unsalted Butter: Use 1/2 cup (115g) of melted butter to bind the crust. The fat solidifies in the fridge, creating that “visible buttery crumb” texture seen in the visual blueprint.
Full-Fat Cream Cheese: 16 oz (450g) of brick-style cream cheese is essential. Avoid the spreadable tubs, as they lack the structural integrity needed for a 2-inch thick filling.
Heavy Whipping Cream: 1.5 cups (360ml) of cold cream provides the “snow-white” whipped volume. It acts as the aerator that keeps the filling from feeling overly dense.
Powdered Sugar: 1 cup (120g) provides sweetness without the graininess of granulated sugar. It dissolves instantly into the whipped cream cheese for a velvety mouthfeel.
Fresh Strawberries: You will need 1 lb (450g) total. Half will be pureed for the glossy glaze, while the rest are reserved for the halved fresh garnish.
Cornstarch: 1 tbsp (8g) is the “invisible” hero here. When simmered with the berry puree, it creates that thick, glossy, ruby-red transparency.
Fresh Mint: A single sprig of bright green mint provides the final color contrast. It adds a cooling aroma that complements the chilled cream.
Professional Tools for a Flawless Set
To achieve the sharp, clean edges shown in our photography, you should use an 8×8-inch (20x20cm) square metal baking pan lined with parchment paper. A metal pan conducts the cold faster than glass, helping the base set into a “dense foundation” quickly.
An electric hand mixer or stand mixer is non-negotiable for the filling. You need to incorporate enough air into the heavy cream to achieve “stiff peaks,” which ensures the 2-inch layer doesn’t collapse under the weight of the glaze.
The Secret to a Perfectly Compressed Graham Cracker Base
Step 1: Constructing the Golden Foundation
In a medium bowl, combine your 2 cups (200g) of graham cracker crumbs with 1/4 cup (50g) of granulated sugar. Slowly pour in the 1/2 cup (115g) of melted butter and stir until the mixture resembles wet sand.
Press the mixture into your lined pan using the bottom of a flat measuring cup. Apply significant pressure until the crumbs are “dense” and “visible” as a singular, solid unit. Chill in the freezer for 15 minutes.
Step 2: Whipping the Snow-White Filling
In a large chilled bowl, beat the cold heavy cream until it reaches stiff peaks. Set this aside in the refrigerator to maintain its structural integrity.
In a separate bowl, beat the room-temperature cream cheese with powdered sugar and 1 tsp (5ml) of vanilla until completely smooth. Gently fold the whipped cream into the cream cheese mixture until no white streaks remain, keeping the texture “velvety and whipped.”
Step 3: Creating the Glossy Ruby-Red Glaze
Puree 1/2 cup (100g) of strawberries and strain through a fine-mesh sieve to remove seeds. In a small saucepan, whisk the puree with 2 tbsp (25g) of sugar and the cornstarch slurry (1 tbsp cornstarch mixed with 1 tbsp water).
Simmer over medium heat until the mixture transforms from opaque to “glossy ruby-red” and thickens significantly. Let this cool to room temperature before pouring, or it will melt your white filling.
Step 4: Final Assembly and Chilling
Spread the white filling over the chilled crust, smoothing the top with an offset spatula. Pour the cooled strawberry glaze over the center, allowing it to spread to the edges.
Transfer the pan to the refrigerator for at least 6 hours, or ideally overnight. This “chilled state” is vital for the clean drip effect when the bars are eventually sliced and held aloft.
Expert Tips for a Professional Finish
- The Clean Cut: To get the sharp edges seen in the macro photo, wipe your knife clean with a warm, damp cloth between every single cut.
- Glaze Temperature: Ensure your glaze is completely cool but still pourable. If it’s too hot, it will swirl into the white filling instead of sitting on top.
- Room Temp Cheese: Never use cold cream cheese for the filling. It will create tiny lumps that ruin the “velvety snow-white” aesthetic.
- The Mint Timing: Only add the fresh mint sprig at the very moment of serving. The moisture from the glaze will wilt the mint if it sits too long.
How to Store and Preserve Your Summer Treats
Keep these bars in an airtight container in the refrigerator for up to 4 days. Because this is one of those essential no-bake summer desserts, it relies on cold temperatures to stay upright; do not leave it on the counter for more than 20 minutes.
You can freeze the cheesecake bars (without the fresh garnish) for up to 2 months. Thaw them in the fridge for 4 hours before adding the fresh halved strawberries and mint for that “just-made” look.
What to Serve With These Strawberry Bars
To create a full summer spread, pair these bars with other effortless treats like our creamy no-bake Oreo dessert or a batch of lemonade puppy chow.
If you’re hosting a backyard party, start with refreshing cold appetizers like cucumber ranch salad to keep the “no-cook” theme going strong from start to finish.
Frequently Asked Questions
Yes, you can use frozen strawberries for the pureed glaze, but ensure you simmer them long enough with the cornstarch to reach that glossy, thick consistency. Always use fresh berries for the final garnish.
While some recipes use gelatin, this recipe uses a cornstarch slurry simmered with strawberry puree. This creates a high-shine, ruby-red finish that remains soft and spoonable rather than rubbery.
Use brick-style, full-fat cream cheese and whip your heavy cream to very stiff peaks. This creates the structural integrity needed for a 2-inch thick filling that doesn’t collapse.
For the best ‘macro-photo’ slices, chill the bars for at least 6 hours. Overnight is even better to ensure the filling is completely set and the glaze has its glossy finish.
This usually happens if the butter isn’t thoroughly mixed or if the crust isn’t pressed down firmly enough. Use the bottom of a flat cup to pack the crumbs into a dense foundation.
The Ultimate Chilled Strawberry Cheesecake Bars
No-bake summer desserts: The Ultimate Chilled Strawberry Cheesecake Bars
Ingredients
Equipment
Method
- Combine graham cracker crumbs, melted butter, and sugar. Press firmly into a lined 8x8-inch pan and freeze for 15 minutes.
- Beat heavy cream to stiff peaks in a cold bowl.
- Beat cream cheese, powdered sugar, and vanilla until velvety smooth.
- Gently fold whipped cream into the cheese mixture. Spread over the crust and level with a spatula.
- Puree 1/2 cup strawberries, strain, and simmer with sugar and cornstarch slurry until glossy ruby-red. Cool completely.
- Pour glaze over filling. Chill in refrigerator for at least 6 hours.
- Just before serving, top with halved fresh strawberries and a mint sprig.
Notes
Ensure the glaze is room temperature before pouring to avoid melting the filling.
Experience the Coolest Part of Summer
These strawberry cheesecake bars prove that you don’t need heat to create a high-impact dessert. With their striking layers and glossy finish, they are the crown jewel of no-bake summer desserts. Whether you’re serving them on a minimalist white plate or enjoying a handheld slice, the creamy, chilled texture is the ultimate relief from the heat.
If you loved this visual recipe, please leave a comment below and let us know how your ruby-red glaze turned out! Don’t forget to save this to your favorite dessert boards on Pinterest so you can find it whenever the temperature starts to rise.