When the temperature rises and the craving for something bright, tangy, and refreshingly cool hits, nothing beats the sophisticated layers of a Key lime pie trifle. This isn’t just a dessert; it is a structural masterpiece of citrus engineering that balances the aggressive pucker of lime with the mellow sweetness of cream.
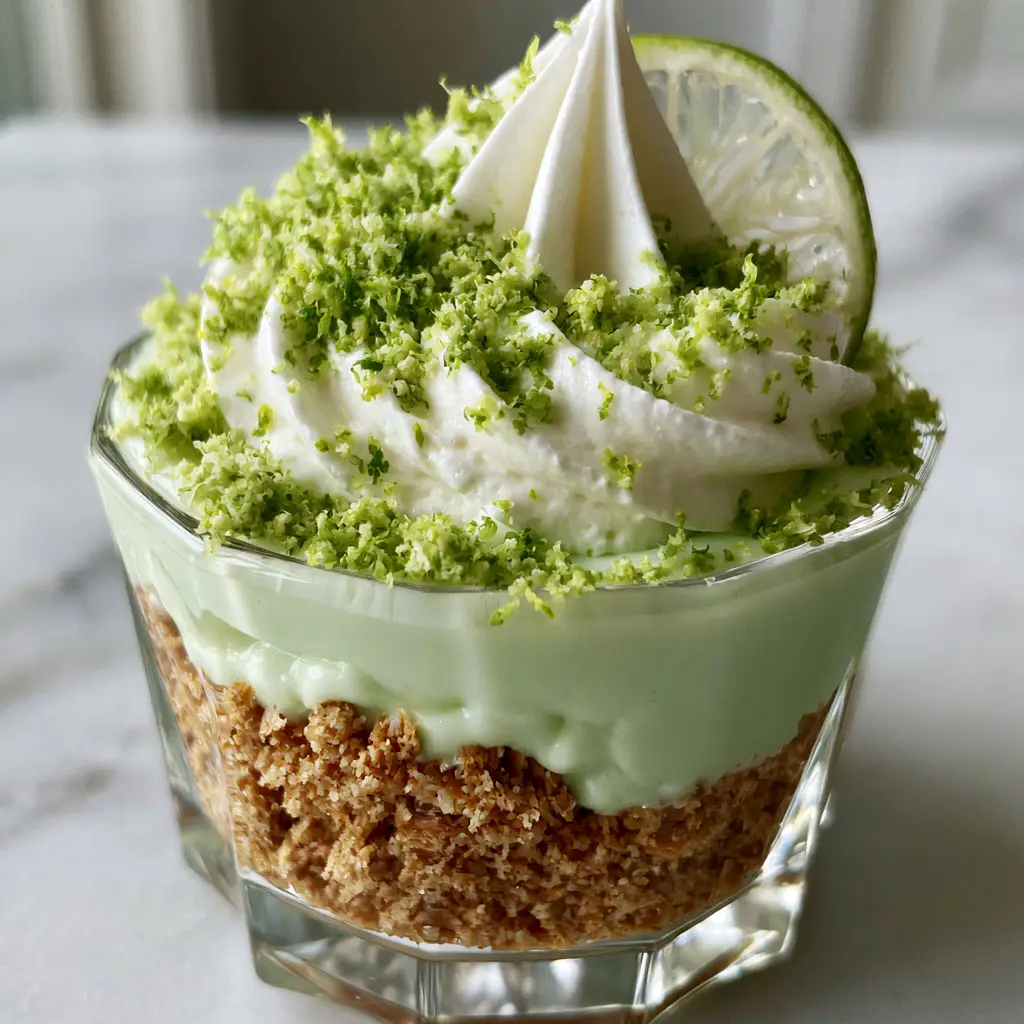
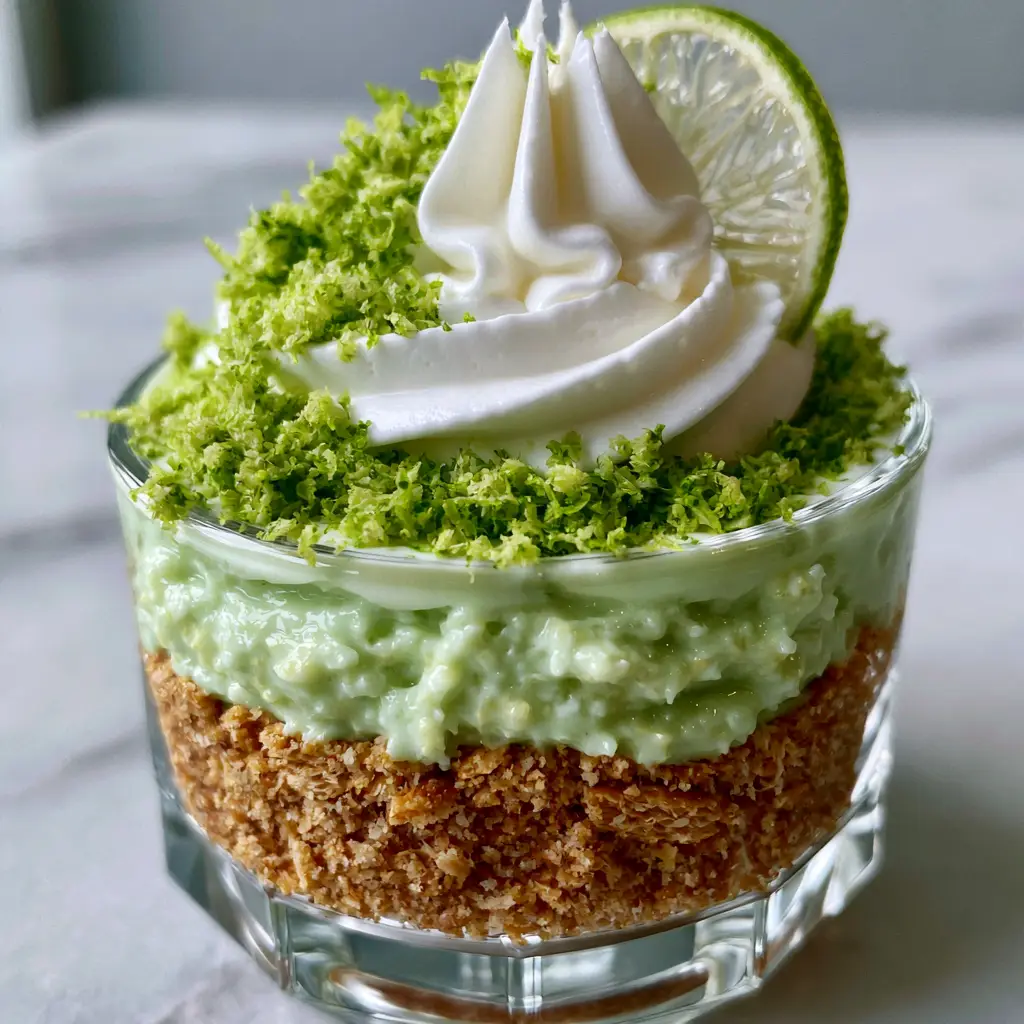
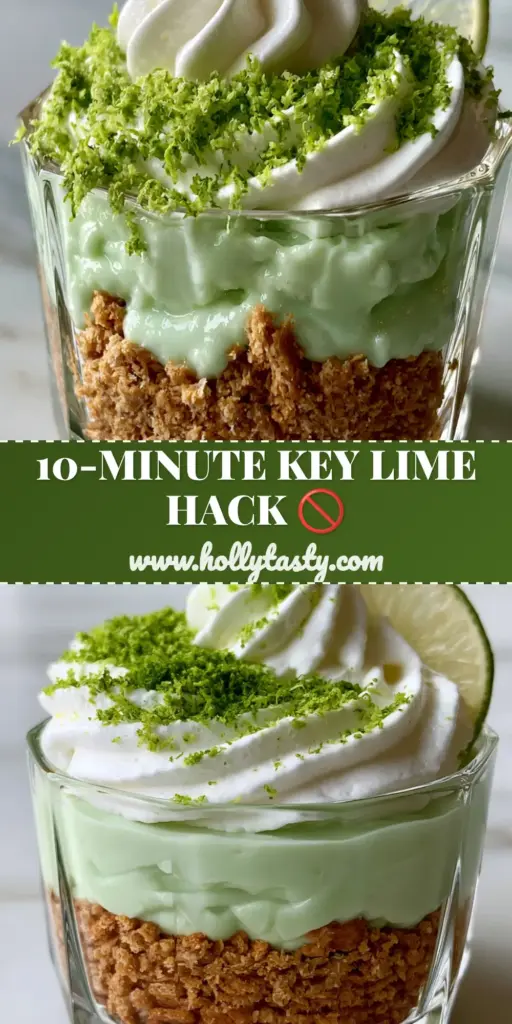
The beauty of this individual Key lime pie trifle lies in its visual contrast. Imagine peering through a faceted glass to see a rugged, golden-brown foundation of buttery graham cracker crumbs, topped with a dense, velvety pale-mint green filling that glows with freshness.
Topped with a cloud of stiff-peak whipped cream and finished with a flurry of neon-green micro-planed zest, this dessert is a masterclass in textures. Whether you are hosting a summer soirée or looking for a weeknight indulgence, this guide will show you how to achieve professional-grade results every single time.
Why You Will Absolutely Love This Zesty Citrus Masterpiece
- Perfect Structural Integrity: Unlike a traditional pie that can slump when sliced, these individual trifles maintain their sharp, distinct layers from the first spoonful to the last.
- The Ultimate Texture Play: You get the satisfying crunch of coarse crumbs, the silky density of the lime filling, and the airy lightness of home-whipped cream in every bite.
- No-Bake Simplicity: This recipe utilizes the natural chemical reaction between lime acid and condensed milk to set the filling, meaning no oven time is required during hot summer months.
- Gourmet Presentation: The addition of translucent lime wheels and micro-planed zest transforms a simple sweet into a centerpiece-worthy treat.
The Scientific Foundation of Your Key Lime Pie Trifle Ingredients
To achieve the exact visual and flavor profile described in our blueprint, every ingredient must serve a specific culinary purpose. We aren’t just mixing flavors; we are building a stable, multi-textured environment.
Coarse Graham Cracker Crumbs: You will need 1.5 cups (150g) of graham cracker crumbs. Unlike a fine powder, we want a coarse grind to ensure the “thick, textured foundation” visible in the glass remains crunchy even after the filling is added.
Unsalted Melted Butter: 6 tbsp (85g) of high-quality butter acts as the mortar for our crumb foundation. It provides the “golden-brown” hue and a rich, savory counterpoint to the tart lime.
Sweetened Condensed Milk: One 14-ounce (396g) can is the heart of the “velvety” filling. It provides the body and the sweetness that tames the lime’s acidity.
Full-Strength Key Lime Juice: 1/2 cup (120ml) of juice is required. The citric acid in the juice reacts with the proteins in the milk, thickening it into a dense, spoonable consistency without the need for gelatin.
Heavy Whipping Cream: 1 cup (240ml) of cold heavy cream is essential for those “sharp, stiff peaks.” It must have at least 36% milk fat to hold its shape against the weight of the lime wheel.
Micro-Planed Lime Zest: The zest of 2 large limes provides that “neon-green” pop of color and essential oils that offer an aromatic punch the juice alone cannot provide.
Powdered Sugar: 2 tbsp (30g) will stabilize your whipped cream and ensure it stays airy for hours. It dissolves faster than granulated sugar, preventing a grainy texture.
Neon Green Food Coloring (Optional): To achieve the “pale-mint green” look often associated with classic Florida recipes, a single drop of gel coloring may be used, as natural lime juice is actually yellowish-clear.
Essential Equipment for Professional Results
Achieving the visual perfection of a high-end food blog requires more than just a spoon. To get those clean lines and sharp peaks, ensure you have these tools ready.
A Microplane Zester is non-negotiable for that “heavy dusting” of vibrant zest. Standard box graters produce shreds that are too thick and can be bitter; the microplane creates the neon-green “snow” seen in the prompt.
For the filling, a silicone spatula allows you to fold the lime juice into the milk thoroughly without introducing too many air bubbles, preserving the “velvety” density. To get the “large, airy swirl,” a piping bag with a large open star tip is highly recommended.
Finally, utilize clear, faceted glass cups. The facets catch the light, highlighting the “translucent” nature of the lime slices and the distinct “thick, textured foundation” of the crumbs.
Step-by-Step Architecture: Crafting the Crumb Base
Engineering the Golden-Brown Foundation
Start by pulsing your graham crackers in a food processor until you have a mixture of fine sand and small, pea-sized chunks. This variance in size is what creates the “textured foundation” described in our visual blueprint.
In a medium bowl, combine the 1.5 cups (150g) of crumbs with 6 tbsp (85g) of melted butter and a pinch of sea salt. Stir until the mixture looks like wet sand. Press approximately 3 tablespoons of this mixture into the bottom of each faceted glass. Use the back of a small spoon to pack it firmly, ensuring a visible, even golden-brown layer.
Creating the Velvety Pale-Mint Filling
The Chemistry of Citrus Thickening
In a large glass bowl, pour in the 14-ounce (396g) can of sweetened condensed milk. Slowly whisk in the 1/2 cup (120ml) of lime juice. You will notice the mixture begin to thicken almost instantly; this is the acid-induced denaturation of the milk proteins.
If you desire the “pale-mint green” hue from the visual prompt, add one tiny drop of green gel food coloring now. Whisk until the color is perfectly uniform and the texture is “dense and velvety.” Spoon this mixture over the graham cracker base, filling the glass about two-thirds of the way up. Smooth the top with a small offset spatula.
Mastering the Stiff-Peak Whipped Topping
Stabilizing the Airy Swirl
Pour 1 cup (240ml) of very cold heavy cream into a chilled bowl. Using a hand mixer or stand mixer, begin whisking on medium-high speed. Once the cream starts to thicken, sift in the 2 tbsp (30g) of powdered sugar.
Continue whisking until the cream reaches “sharp, stiff peaks.” This means when you lift the beaters, the cream stands straight up without drooping. This stability is vital to support the “single, ultra-thin, translucent lime wheel” that will be tucked into it later. Transfer the cream to a piping bag for the best visual results.
The Final Flourish: Assembly and Garnish
Applying the Sensory Details
Pipe a “large, airy swirl” of the whipped cream onto the center of each lime layer. Aim for height and volume to contrast with the dense filling below. Next, take your microplane and your fresh limes. Zest directly over the glasses, allowing the “vibrant, neon-green” particles to fall naturally across the white peaks.
Finally, slice a fresh lime into “ultra-thin, translucent” rounds. Cut a small slit into the center of one round and tuck it elegantly into the side of the whipped cream swirl. This adds the final touch of “culinary forensics” accuracy to your Key lime pie trifle.
Expert Tips for Success
- The Temperature Rule: Ensure your heavy cream is ice-cold. If the cream is even slightly warm, it will not achieve the sharp peaks necessary for this specific visual style.
- Avoid the Pith: When zesting, only take the very top neon-green layer. The white pith underneath is bitter and will ruin the delicate balance of the dessert.
- Resting Time: While this is a no-bake treat, it needs at least 2 hours in the refrigerator to allow the lime filling to fully set into its “velvety” state.
- Slicing Translucency: Use a very sharp mandoline or a serrated tomato knife to get those lime wheels thin enough to be translucent.
Make-Ahead and Storage Guidelines
These trifles are excellent for prep-ahead entertaining. You can prepare the crumb base and the lime filling up to 24 hours in advance. Keep them covered in the refrigerator to prevent the filling from absorbing any “fridge smells.”
For the best texture, wait to add the whipped cream and the “vibrant, neon-green” zest until just before serving. The sugar in the cream can draw moisture out of the lime zest, causing it to wilt if left for too long. If you have leftovers, they will stay delicious for up to 3 days, though the graham cracker foundation may lose some of its “textured” crunch.
What to Serve With This Refreshing Dessert
Because the Key lime pie trifle is so bright and acidic, it pairs beautifully with salty or savory precursors. If you are hosting a summer party, consider starting with some cold appetizers to keep the theme light and breezy.
For a heavier main course, a classic southern potato salad provides a creamy, starchy contrast to the citrus finish of the trifle. If you want to lean into the fruit theme, serving these alongside peach dumplings offers a lovely “stone fruit vs. citrus” tasting experience for your guests.
If you’re looking for more inspiration for your next gathering, don’t miss our guide on no-bake summer desserts which features other time-saving treats that won’t heat up your kitchen.
Frequently Asked Questions
Absolutely! Simply double the crumb and filling layers to fit a standard trifle dish. Be aware that the individual glasses offer better ‘visual forensics’ and structural support for the layers.
Yes, you can use Persian (regular) limes. Key limes are smaller and more acidic, but the science of the condensed milk thickening will still work with standard lime juice. The flavor will be slightly less floral but still delicious.
Use heavy whipping cream with at least 36% fat and ensure it is ice-cold. Whisk on medium-high speed and stop as soon as the cream stands straight up on the beaters. Adding powdered sugar also helps stabilize the peaks.
The filling and crust stay fresh for up to 3 days in the refrigerator. However, the whipped cream is best when added fresh, as it can start to lose its airy volume after 24 hours.
The thickening is caused by a reaction between the acid in the juice and the milk protein. Ensure you are using full-fat sweetened condensed milk and at least 1/2 cup of juice. If it is still thin, chill it for at least 2 hours to help it set.
The Ultimate Individual Key Lime Pie Trifle Recipe
Key lime pie trifle: The Ultimate No-Bake Individual Dessert Guide
Ingredients
Equipment
Method
- Combine coarse graham cracker crumbs, melted butter, and salt in a bowl until the texture resembles wet sand.
- Press 3 tablespoons of the mixture into the bottom of each glass cup to form a thick, golden-brown foundation.
- Whisk sweetened condensed milk and lime juice together until dense and velvety. Add food coloring if desired for a pale-mint green hue.
- Spoon the lime mixture over the crumb base, filling the glasses two-thirds full.
- Whisk cold heavy cream and powdered sugar until sharp, stiff peaks form. Pipe a large swirl onto each trifle.
- Dust heavily with micro-planed lime zest and tuck a single, ultra-thin lime wheel into the cream.
Notes
For the most vibrant green, zest the limes immediately before serving.
Closing & Call to Action
There is nothing quite like the first spoonful of a perfectly executed Key lime pie trifle. The way the tart lime filling cuts through the rich cream and buttery crumbs is a culinary experience every home cook should master. This recipe proves that you don’t need an oven to create a dessert that is both visually stunning and scientifically sound.
If you made this recipe and loved the “velvety” texture and “neon-green” finish, please leave a comment below! I would love to hear how your layers turned out. Don’t forget to follow me on Pinterest and share this recipe with your fellow dessert enthusiasts.